Fermented Pickles
Fermented Pickles
- Total Time: 15 minutes
Description
This is the easiest ferment you’ll ever make, so simple it feels like a practical joke: put cucumbers and salt water in a jar, do nothing for a few days, and wind up with the best pickles you’ve ever had. I crunch on them straight from the fridge, when they are salty, cool, and refreshing.
Okay, so you do have to boil the water to make the brine, plus add garlic cloves and a few optional seasonings to the jar. And you’ll need to check on the jar every day, but come on—how can you not? The magic of fermentation will make you feel like a kid. In fact, if you have kids, do this project with them.
Old-Time Stories of Pickling
What we in America call dill pickles are a beloved tradition in Eastern Europe and many American communities with Eastern European heritage: Poland, Germany, Czechoslovakia, Georgia, Ukraine, and Russia. You’ll see all sorts of variations, but they are all essentially cucumbers fermented in a saltwater brine with maybe a few flavorings added (most notably garlic and, of course, dill).
Canning was not a fixture of households until the early 1900s, and neither was refrigeration. Before that, people fermented pickles in the summer and stashed them in a cool place for storage. Even now, when I talk to people who grew up in rural areas in the 1950s, they’ll say things like, “My grandmother had a giant crock of pickles with plates on top and she’d keep it in the cellar.”
City folk, who had less space for giant crocks, got their pickles already made at shops right in their neighborhoods–and if you go to one of the few remaining authentic delis in North America, that’s the kind of pickles they’ll be serving.
The Best Jar for Pickling
The best jar for this is also the hardest to get unless you know someone who saves giant old jars (umm, me). A dedicated pickler will come to covet two to three-quart jars that once held store-bought pickles or fruit salad. I scour thrift stores for them.
Don’t have this rare and special jar on hand? Don’t worry. I developed this recipe for two 1-quart jars.
Ferment Now, Can Later
I just keep my pickles in the fridge, but if you want (and you have a crock big enough), you can make a big old batch and water bath can your pickles for storing at room temperature (the color and flavor of the pickles changes in the canning process).
Ferment your pickles according to the method below, then can them with these directions from the National Center for Home Food Preservation.
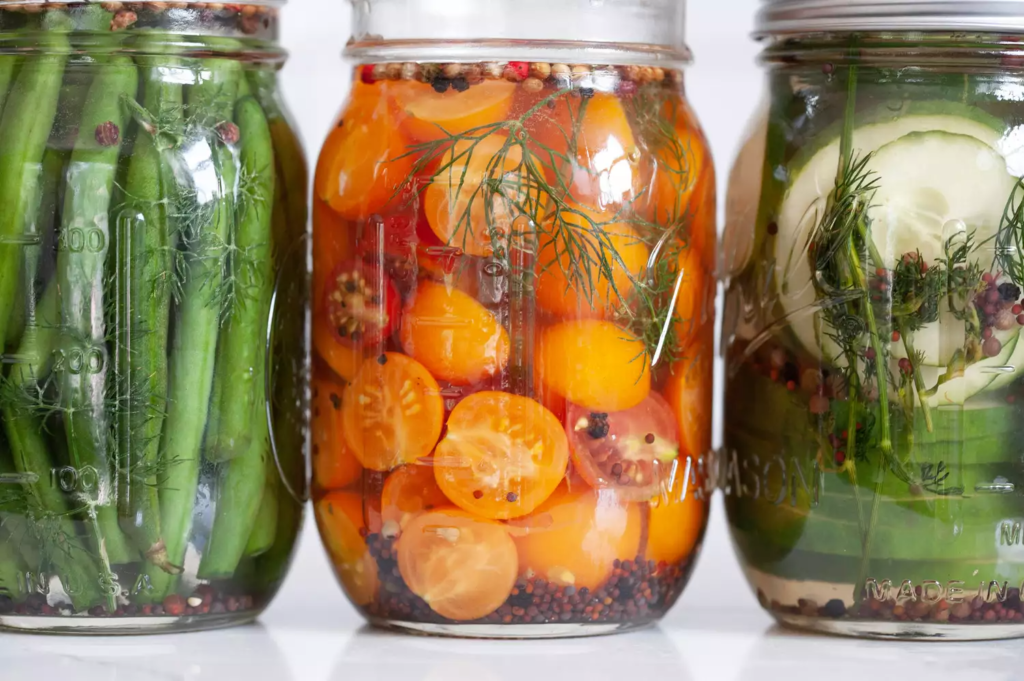
Play Around With Seasonings
I’ve made these with no additional seasoning but garlic cloves and they still turn out magnificent. However, for these to be dill pickles, you need some form of dill. Fortunately, there’s a lot of leverage you have with flavoring these.
- Use any form of dill: fresh sprigs, dill heads from your garden, dried dill weed, or dried whole dill seeds.
- Slip a few halved fresh hot peppers in the jar instead of the dried pepper.
- If you grow your own horseradish, tuck a fresh horseradish leaf in the jar before you add the seasonings, cukes, and brine (this tip came from Olia Hercules’ “Summer Kitchens,” which has all kinds of enticing ferments for you to try).
- If you love rhubarb, trim a few stalks and sneak those into the jar, too. Pickled rhubarb is really tasty and pleasantly tart.
Use Up Those Pickles
You probably don’t need my help in knowing what to do with your finished pickles. For maximum enjoyment, eat them right out of the jar or sidled next to your favorite sandwich. Other ideas:
- Chop them up and use them in relishes, sauces, and slaws.
- Add them to potato or tuna salad.
- Once your jar is empty, use the brine to brine chicken breasts or shrimp.
Ingredients
-
4 cups water
-
20 grams kosher salt or fine sea salt (see recipe note)
-
5 cloves garlic, smashed
-
10 peppercorns, optional
-
1 to 2 dried chiles, optional
-
1 to 2 heads fresh dill, or 1 bunch fresh dill, or 1 teaspoon dried dill or dill seeds, optional
-
2 pounds small pickling cucumbers (such as Kirby), rinsed
-
Special Equipment
- 2 wide-mouth (1-quart) canning jars, or 1 (2 to 3-quart) glass jar
Instructions
Bring the water to a boil. Add the salt and stir until the salt is dissolved. Let cool to room temperature.
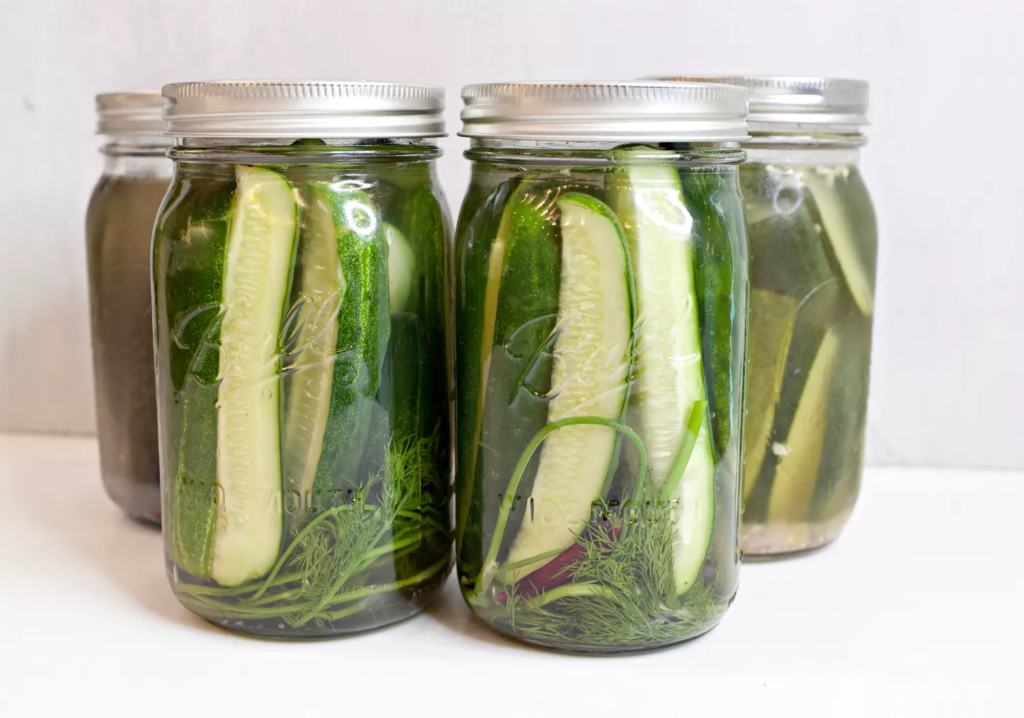
Put the garlic and (if using) peppercorns, dried chile, and dill in the jar(s). Set aside.
Trim any mushy or blemished spots from the cucumbers. Quarter any larger cucumbers to make long spears. Halve the ones that are a bit thicker; the slender tiny cucumbers you can leave whole. You likely won’t need to cut the stem or blossom ends off the cucumbers, but if they are wrinkly or soft, trim them off.
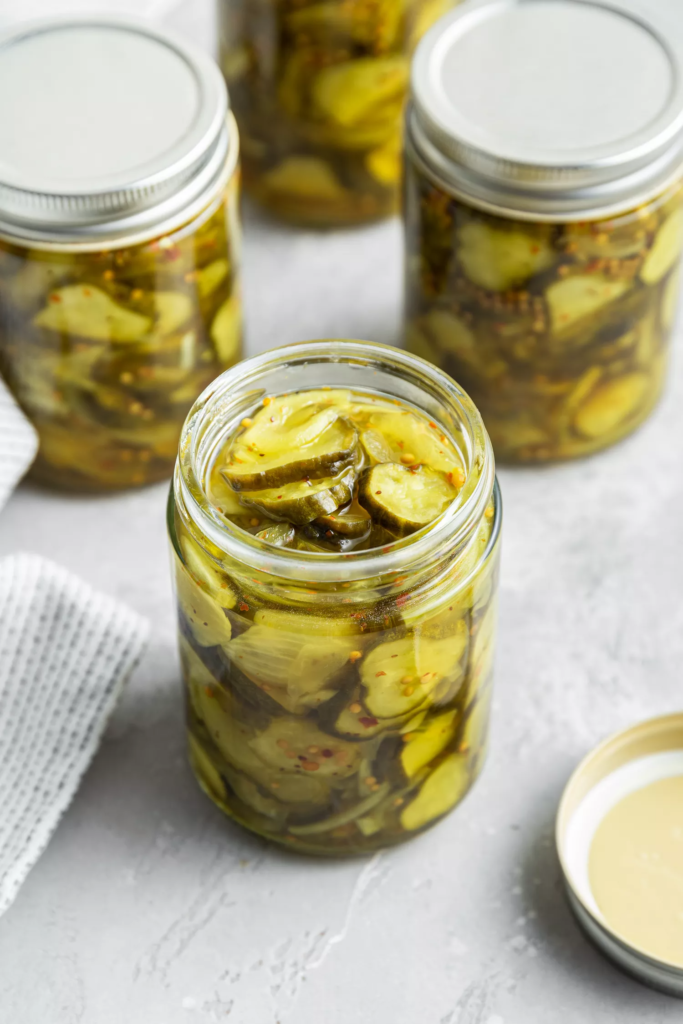
Pack the cucumbers into the jar (or jars) standing upright. If any of the spears are too tall and stick out of the jar, trim them so there’s at least 1 inch of space between the tops of the spears and the rim of the jar.
Really cram the cucumbers in there. You might be able to get them all in this way, but sometimes with a large jar, I have to lay the shorter ones across the top.
Pour the cooled brine into the jars. The cucumbers should be totally submerged, ideally by 1 inch. Leave at least a few inches of empty space at the top of the jar, because the brine will foam up.
Screw on the lid and (for reference) label the jar with the date you started.
After 24 hours, check on your pickles. Look at them, smell them, and fish one out to cut off a piece so you can taste it and see how it’s coming along. If any of the spears floated up and are sticking out of the brine, use clean hands to push them back down again.
As the jar sits, the cucumbers will turn a less vivid green, the brine should grow increasingly cloudy, and you’ll notice foam at the top of the jar. This foam is a positive sign that fermentation is underway.
Taste your pickles every day. For a very mild, clean taste, 1 day might suit your needs. I like mine after 3 to 4 days of fermentation. You can go up to 7 days if you like your pickles quite sour and tangy
I find the flavor and texture of the pickles improves after chilling in the refrigerator.
Once the pickles are fermented to your liking, refrigerate the jar for up to 1 month. They’ll still be fine after that, but I do find they get less plump and crunchy as the weeks roll by. Don’t be afraid to chop up the garlic cloves in the jar and use those, too.
Notes
N/A
- Prep Time: 10 mins
- Cook Time: 5 mins